

Burp Suite is a graphical tool and integrated platform for performing
application security testing. Its numerous tools work in unison to assist the
entire testing process, from mapping and analyzing an application's attack
surface to detecting and exploiting security vulnerabilities.
From our previous blog, we were redirected to Dashboard and used
BurpSuite's Chromium Browser. Now let's set up the proxy so Burp can intercept
and capture the browser's request. Go to the Proxy tab and then to the
Options tab. There, you'll find the IP address
127.0.0.1 and port 8080, which are the default configuration. If
you couldn't find one, click the Add button and set one up.

Now that we know the IP address and Port number BurpSuite listens to, we need
to configure the proxy in the browser.
MANUAL CONFIGURATION
- Go to the Options from the right top corner of your Firefox browser.
- Select General, from the left side and scroll down to the bottom where you will find Network Settings, click on the Settings Button.
- Enable Manual Configuration and enter the IP address, Port number and check Also use this proxy for FTP and HTTPS.

Click Ok, and we have successfully configured the Proxy.
CONFIGURATION VIA FOXY PROXY
Manually setting up a proxy every time we would like to capture packets can
be a bit of overwork, and if the Burp isn’t capturing the request the proxy
should be disabled in order to surf the internet seamlessly.
We will thus use one of the Firefox plugins,
FoxyProxy, due to how simple it is to set up the proxy. As a result, we will
always have the choice to enable and disable the proxy from the website we
are currently browsing.
- Add the Foxy Proxy Extension to your browser.
- Once installed, from the right top corner go to Options.

- Click on Add.
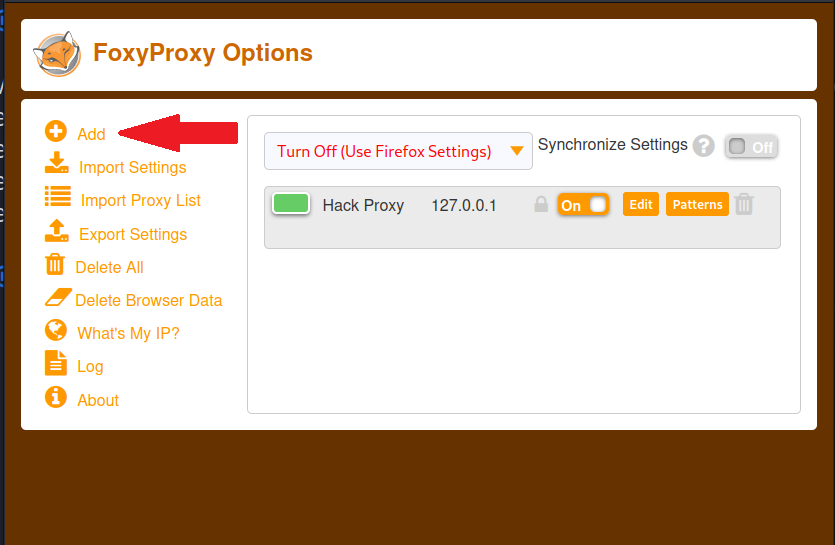
- Fill up the details as before. Give the proxy configuration a name and choose a colour. Make sure to check whether Proxy Type, HTTPS is configured or not. Click on Save.

- The proxy service can be enabled and disabled directly from the web application's home page. Switch on the intercept option to record the HTTP request for the web page and enable the foxy proxy.
- To enable, click on the extension from the right corner and click on the Name of the Proxy.

- Switch the intercept from the Burpsuite and you will be able to capture the requests.
You might be interested in,
- Introduction and Installation of BurpSuite
- Configure BurpSuite Proxy for Mobile Application
- Fuzzing via BurpSuite
We hope this helps. If any suggestions or doubts you can add a comment and
we will reply as soon as possible.

%20Cover.jpg)


No comments:
Post a Comment