Burp Suite is a graphical tool and integrated platform for performing
application security testing. Its numerous tools work in unison to assist the
full testing process, from mapping and analyzing an application's attack
surface to detecting and exploiting security vulnerabilities.
Burp Suite has an intercepting proxy that acts as a man-in-the-middle between
the target application and its web server. It captures HTTP requests on
the go and enables the tester to replay or modify the request before
delivering it to the target server.
Brupsuite comes in different versions, free (community) and paid
(professional). The Professional Edition has a lot more
features activated, including active and passive scanning, saving project,
use of the bApp Store, etc. All of its tools help to speed up and improve
testing. By increasing the number of threads, it even gives us the chance to
take advantage of the built-in payloads for fuzzing and brute-forcing
considerably more quickly.
Although the Community Edition only has a few features, it has all we
require for manual penetration testing. Regardless of whether it involves
capturing, crawling, or altering the request.
INSTALLATION
The first step is to go to the PortSwigger Website and download the Burpsite
version suitable for you. Link -
https://portswigger.net/burp/releases. You can choose the trial option for the Professional edition or the
community version to familiarise yourself with the software before buying.
For the sake of this example, we will be using the professional edition. Prior to using BurpSuite, you need to install the latest version of
Java.
For Linux Users, you can download Linux or JAR. Starting up
BurpSuite in Windows is similar to other software. If you are using
a JAR file to start BurpSuite, you need to use the command line.
Command:
java -jar <file_location>.jar.
Once the start the BurpSuite, you will be prompted with the below-mentioned
screen. Here you can see three options that are pretty self-explanatory. For
the community edition, you can only select Temporary Project (this
means all the work you will do in BurpSuite will no longer be available once
the software is closed).
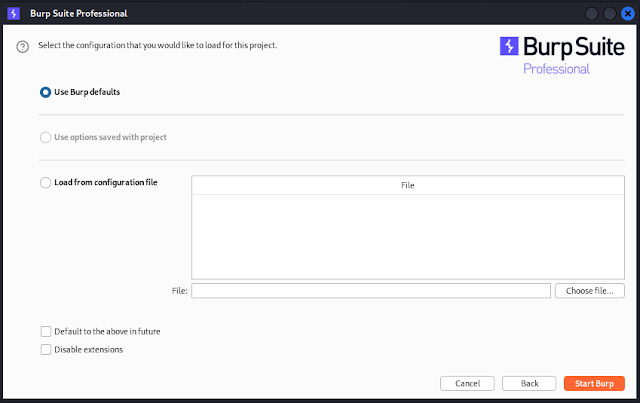
- Once you select the Project Type, on to the Next screen. You will be prompted to use the configuration for BurpSuite. You can load a configuration of your own or get one online from experts. For the time being, select Use Burp Default.
- Click on Start Burp, and you will see the Dashboard.
You might be interested in,
- Configure BurpSuite Proxy for Web Application
- Configure BurpSuite Proxy for Mobile Application
- Fuzzing via BurpSuite
We hope this helps. If any suggestions or doubts you can add a comment and
we will reply as soon as possible.


%20Cover.jpg)

%20Cover.jpg)


No comments:
Post a Comment